学习文章:https://drun1baby.top/2022/05/30/Java-IO%E6%B5%81/#5-FileReader
学习大纲
1
2
3
4
5
6
7
8
9
10
11
12
13
14
15
16
17
18
19
20
21
22
| 1. Java IO
2. 创建文件的三种方式
2.1. 1.根据路径创建一个File对象
2.2. 2. 根据父目录 File 对象,在子路径创建一个文件
2.3. 3.根据父目录路径,在子路径下生成文件
3. 获取文件信息
4. 文件删除
5. 目录操作
5.1. 1.创建单级目录
5.2. 2.创建多级目录
5.3. 3.目录删除
6. IO Stream
7. 关于文件流的一些操作
7.1. 1.Runtime命令执行的payload
7.2. 2.FileInputStream
7.2.1. read()方法
7.2.2. read(byte[] d) 方法
7.3. 3.FileOutputStream
7.3.1. write(byte[] b) 方法
7.3.2. write(byte[] b, int off, int len) 方法
7.4. 4.FileReader
7.5. 5.追加写入
|
Java IO
什么是IO,即为input和output;通过IO操作可以完成对硬盘的读写操作,且IO操作是以内存为中心的。为什么要把数据读到内存才能处理这些数据?因为代码是在内存中运行的,数据也必须读到内存中。IOStream是一种顺序读写数据的模式,它的特点是单向流动。数据类似自来水一样在水管中流动,所以我们把它称为 IO 流。
创建文件的三种方式
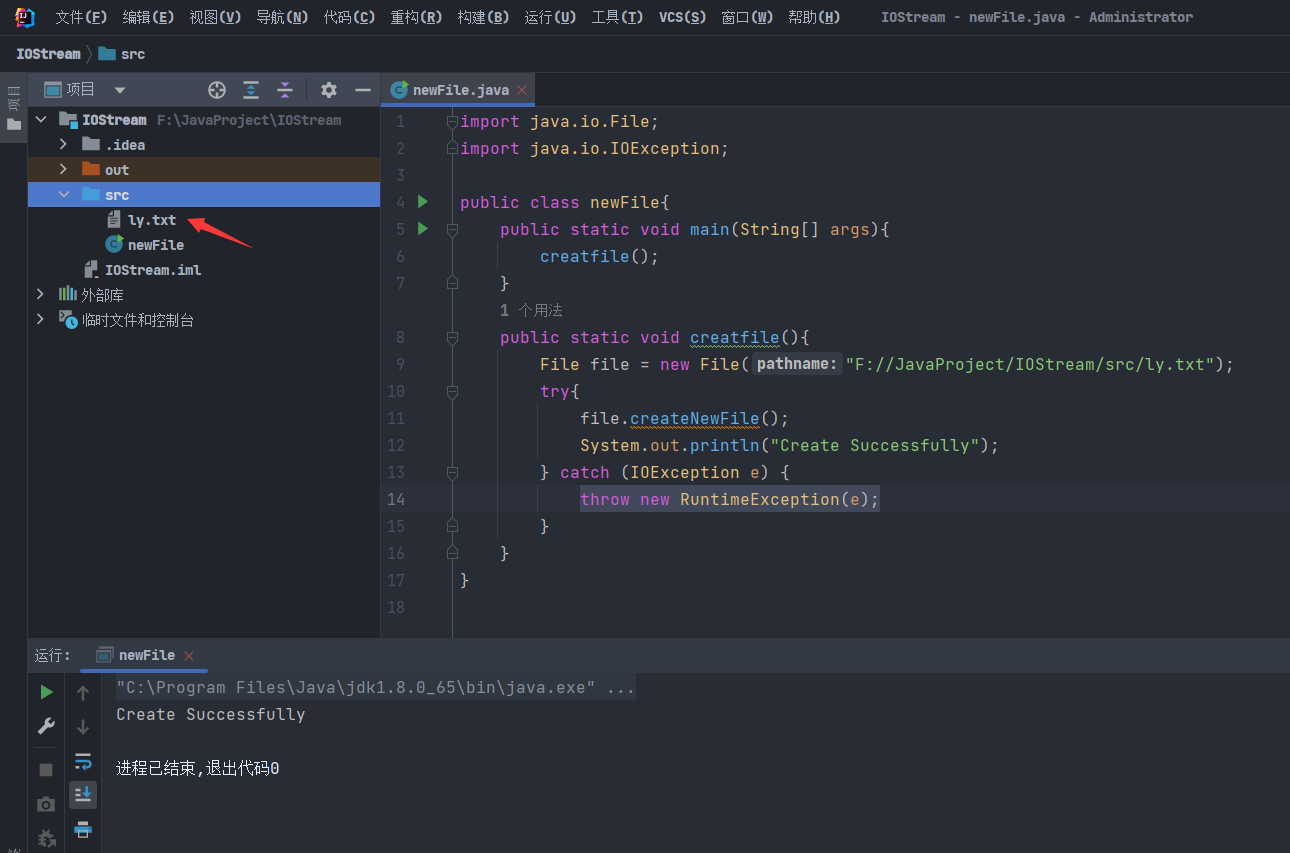
1.根据路径创建一个File对象
方法:new File(String pathname)
1
2
3
4
5
6
7
8
9
10
11
12
13
14
15
16
17
| import java.io.File;
import java.io.IOException;
public class newFile{
public static void main(String[] args){
creatfile();
}
public static void creatfile(){
File file = new File("F://JavaProject/IOStream/src/ly.txt");
try{
file.creatNewFile();
System.out.println("Create Successful");
}catch(IOException e){
throw new RuntimeException(e);
}
}
}
|
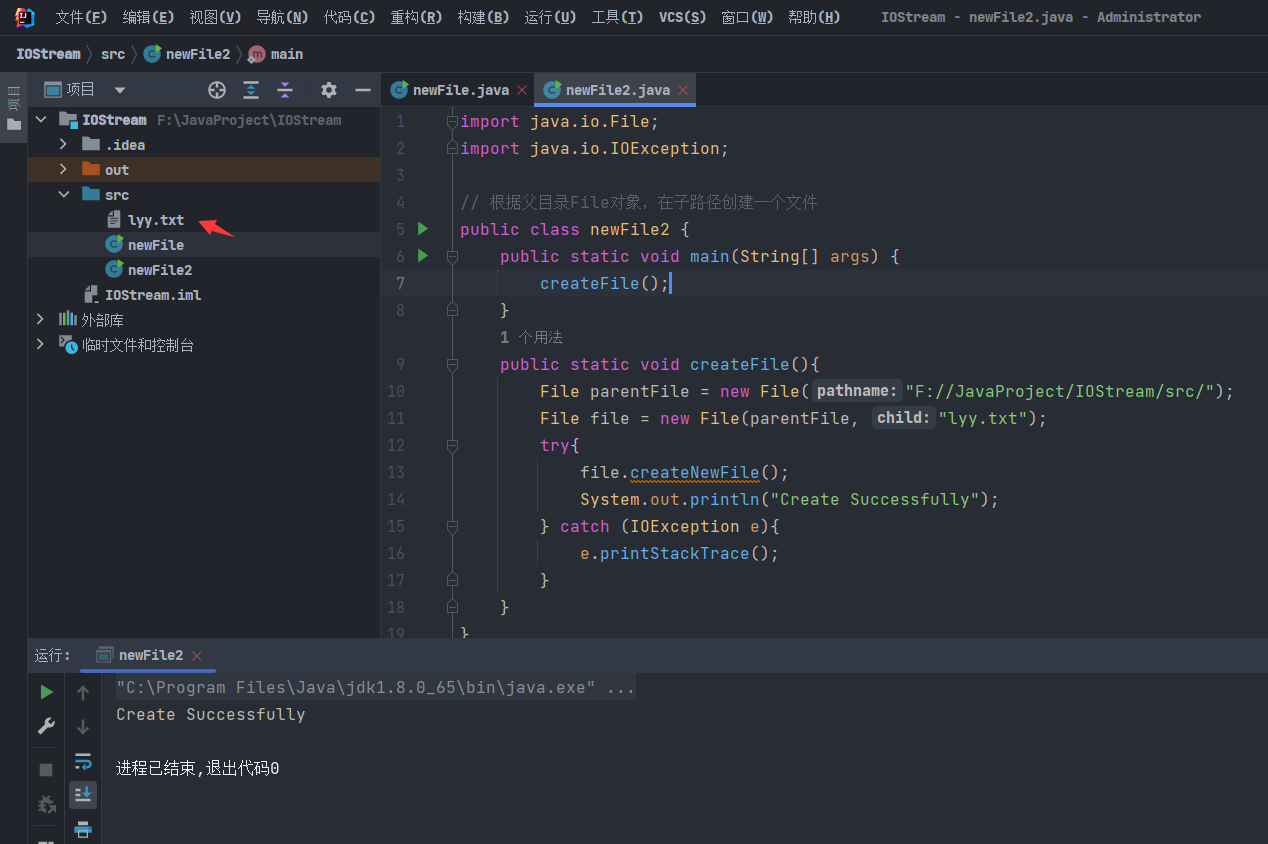
2. 根据父目录 File 对象,在子路径创建一个文件
方法:new File(File parent,String child)
1
2
3
4
5
6
7
8
9
10
11
12
13
14
15
16
17
18
| import java.io.File;
import java.io.IOException;
public class newFile2 {
public static void main(String[] args) {
createFile();
}
public static void createFile(){
File parentFile = new File("F://JavaProject/IOStream/src/");
File file = new File(parentFile, "lyy.txt");
try{
file.createNewFile();
System.out.println("Create Successfully");
} catch (IOException e){
e.printStackTrace();
}
}
}
|
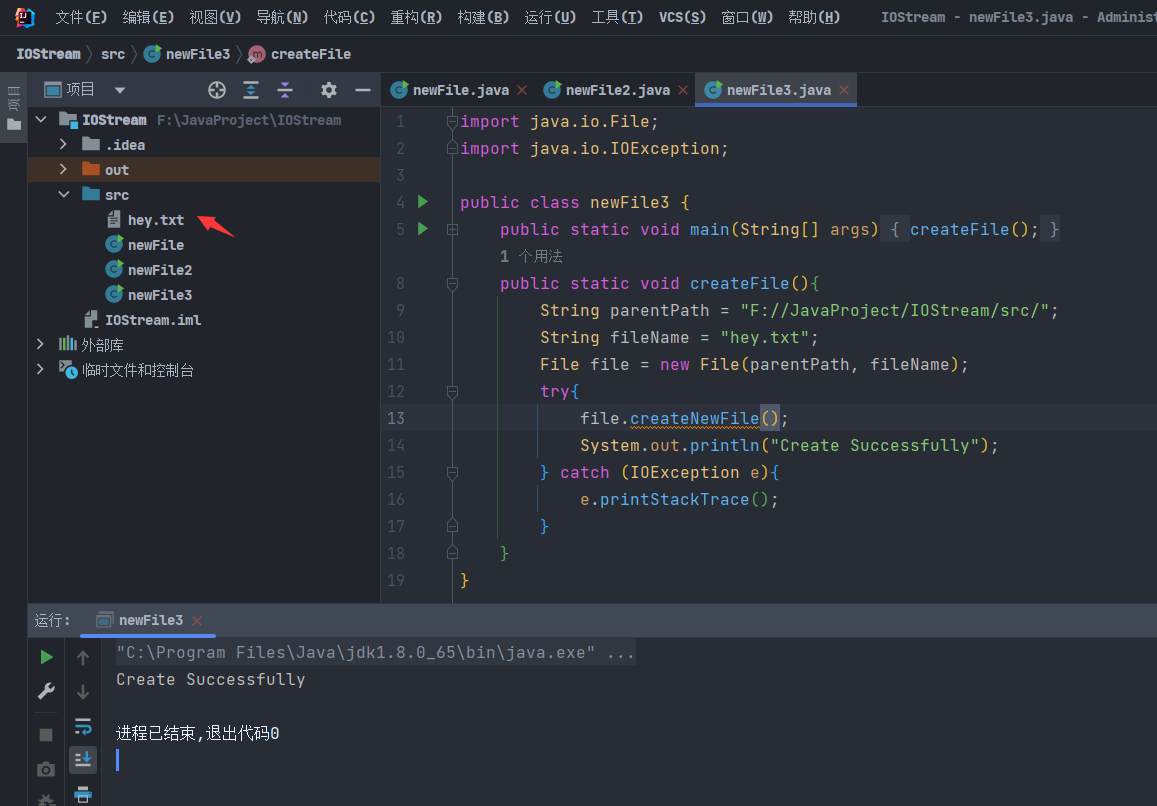
3.根据父目录路径,在子路径下生成文件
方法: new File(String parent, String child)
1
2
3
4
5
6
7
8
9
10
11
12
13
14
15
16
17
18
19
| import java.io.File;
import java.io.IOException;
public class newFile3 {
public static void main(String[] args) {
createFile();
}
public static void createFile(){
String parentPath = "F://JavaProject/IOStream/src/";
String fileName = "hey.txt";
File file = new File(parentPath, fileName);
try{
file.createNewFile();
System.out.println("Create Successfully");
} catch (IOException e){
e.printStackTrace();
}
}
}
|
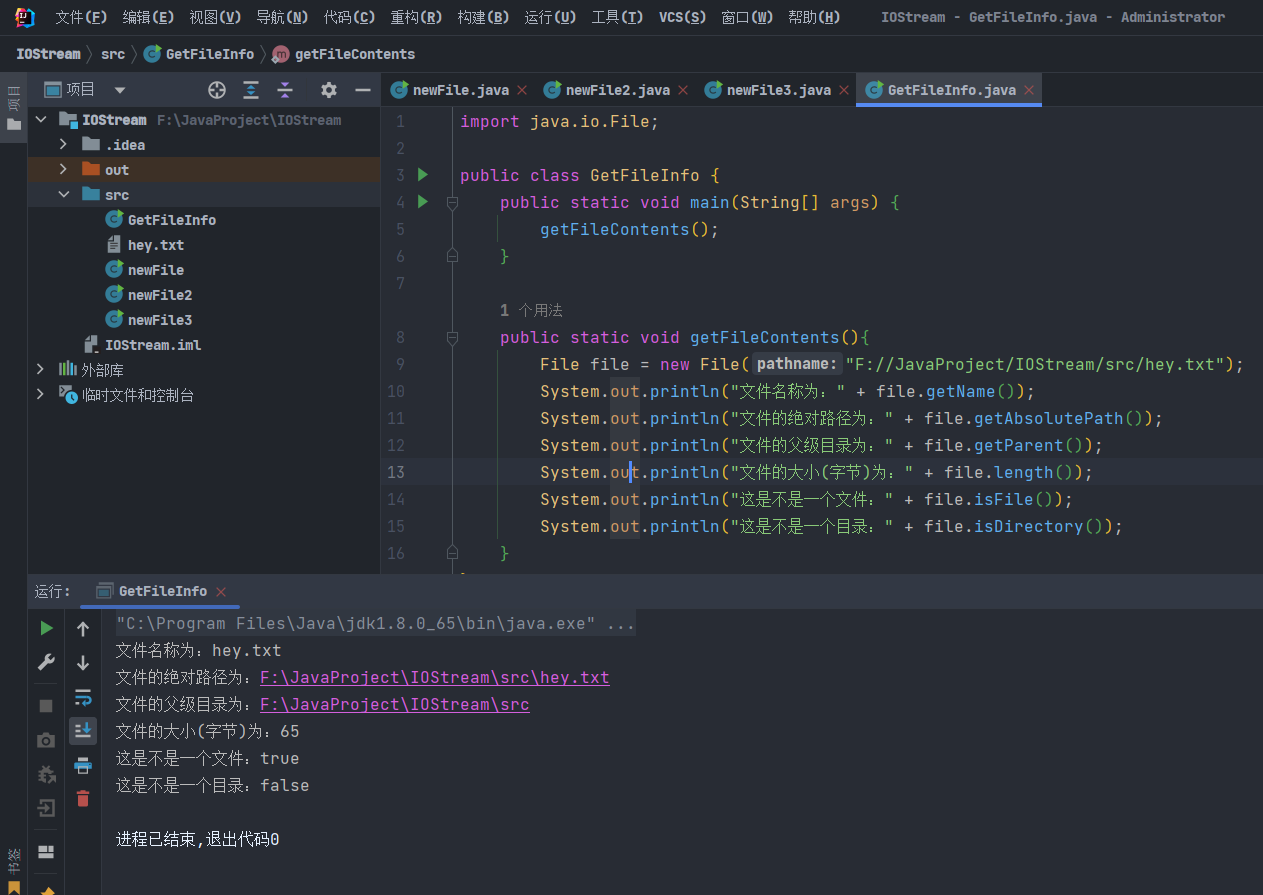
获取文件信息
我们可以通过file类的方法名进行文件信息的获取
1
2
3
4
5
6
7
8
9
10
11
12
13
14
15
16
17
| import java.io.File;
public class GetFileInfo {
public static void main(String[] args) {
getFileContents();
}
public static void getFileContents(){
File file = new File("F://JavaProject/IOStream/src/hey.txt");
System.out.println("文件名称为:" + file.getName());
System.out.println("文件的绝对路径为:" + file.getAbsolutePath());
System.out.println("文件的父级目录为:" + file.getParent());
System.out.println("文件的大小(字节)为:" + file.length());
System.out.println("这是不是一个文件:" + file.isFile());
System.out.println("这是不是一个目录:" + file.isDirectory());
}
}
|
文件删除
方法:file.delete(filename)
1
2
3
4
5
6
7
8
9
10
11
12
13
| import java.io.File;
import java.lang.reflect.Field;
public class FileDelete {
public static void main(String[] args) {
deleteFile();
}
public static void deleteFile(){
File file = new File("F://JavaProject/IOStream/src/ly.txt");
System.out.println(file.delete() ? "Delete Successfully":"Delete failed");
}
}
|
目录操作
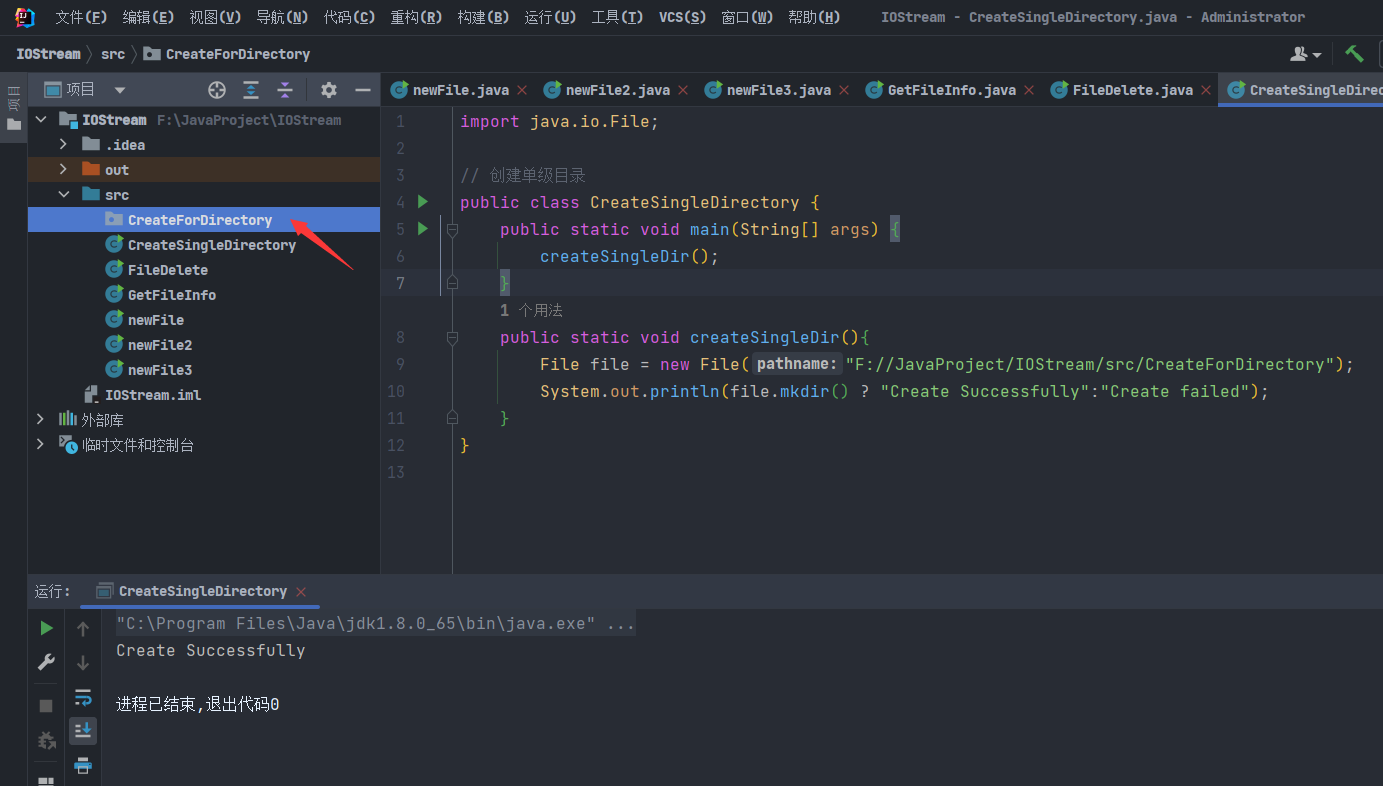
1.创建单级目录
方法:file.mkdir()
1
2
3
4
5
6
7
8
9
10
11
12
| import java.io.File;
public class CreateSingleDirectory {
public static void main(String[] args) {
createSingleDir();
}
public static void createSingleDir(){
File file = new File("F://JavaProject/IOStream/src/CreateForDirectory");
System.out.println(file.mkdir() ? "Create Successfully":"Create failed");
}
}
|
2.创建多级目录
方法:file.mkdirs()
1
2
3
4
5
6
7
8
9
10
11
| import java.io.File;
public class CreateMultiDirectory {
public static void main(String[] args) {
createSingleDir();
}
public static void createSingleDir(){
File file = new File("F://JavaProject/IOStream/src/CreateMultiDirectory/test");
System.out.println(file.mkdirs() ? "Create Successfully":"Create failed");
}
}
|

3.目录删除
删除目录同删除文件相同,使用的是File.delete方法,但它只能删除空目录,所以在删除前需先清除文件。
1
2
3
4
5
6
7
8
9
10
11
| import java.io.File;
public class DirectoryDelete {
public static void main(String[] args) {
deleteDirectory();
}
public static void deleteDirectory(){
File file = new File("F://JavaProject/IOStream/src/CreateForDirectory");
System.out.println(file.delete()? "Delete Successfully":"Delete failed");
}
}
|
IO Stream
按照操作数据单位不同分为字节流和字符流
- 字节流(8bit,适用于二进制文件)
- 字符流(按字符,因编码不同而异,适用于文本文件)
按照数据流方向不同可分为:输入流和输出流
按照功能不同可分为:节点流和处理流
| 抽象基类 |
字节流 |
字符流 |
| 输入流 |
InputStream |
Reader |
| 输出流 |
OutputStream |
Writer |
到这里就非常重要了,因为它与我们后续的命令执行直接相关。这些 IO 流在我们命令执行的 Payload 当中充当着缓冲的作用。
关于文件流的一些操作
根据drun1baby师傅提供的建议,我们在文件流的学习过程中可以从payload看起
1.Runtime命令执行的payload
1
2
3
4
5
6
7
8
9
10
11
12
13
14
15
16
17
18
19
20
21
22
| import java.io.ByteArrayOutputStream;
import java.io.InputStream;
public class RuntimeExec {
public static void main(String[] args) throws Exception {
InputStream inputStream = Runtime.getRuntime().exec("whoami").getInputStream();
byte[] cache = new byte[1024];
ByteArrayOutputStream byteArrayOutputStream = new ByteArrayOutputStream();
int readLen = 0;
while ((readLen = inputStream.read(cache))!=-1){
byteArrayOutputStream.write(cache, 0, readLen);
}
System.out.println(byteArrayOutputStream);
}
}
|
我们结合drun1baby师傅提供的这一串Payload 来学习 Java IO 流。
read()方法
1
2
3
4
5
6
7
8
9
10
11
12
13
| public int read() throws IOException {
return read0();
}
从此输入流中读取一个数据字节。
如果没有输入可用,则此方法将阻塞。
指定者: 类 InputStream 中的 read
返回: 下一个数据字节;如果已到达文件末尾,则返回 -1。
抛出: IOException - 如果发生 I/O 错误。
|
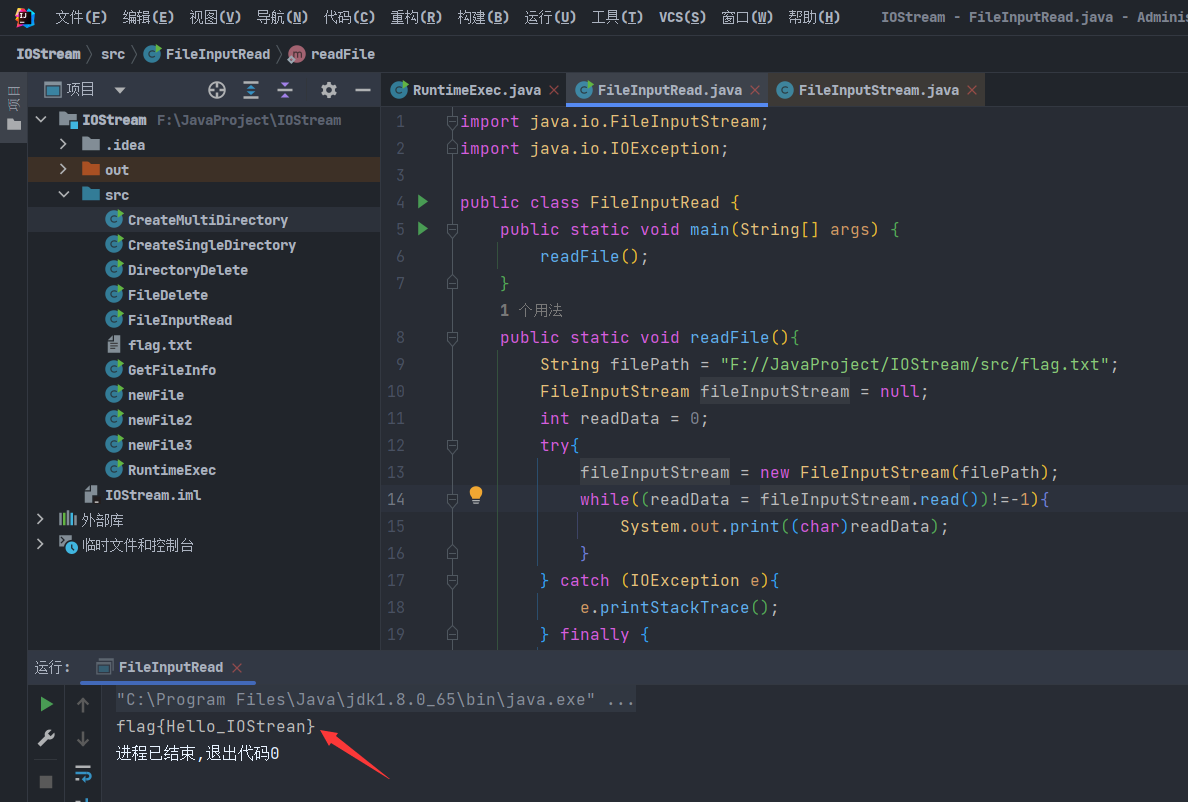
此时我们使用FileInputStream.read()来读取文件内容
1
2
3
4
5
6
7
8
9
10
11
12
13
14
15
16
17
18
19
20
21
22
23
24
25
26
27
| import java.io.FileInputStream;
import java.io.IOException;
public class FileInputRead {
public static void main(String[] args) {
readFile();
}
public static void readFile(){
String filePath = "F://JavaProject/IOStream/src/flag.txt";
FileInputStream fileInputStream = null;
int readData = 0;
try{
fileInputStream = new FileInputStream(filePath);
while((readData = fileInputStream.read())!=-1){
System.out.print((char)readData);
}
} catch (IOException e){
e.printStackTrace();
} finally {
try{
fileInputStream.close();
} catch (IOException e){
e.printStackTrace();
}
}
}
}
|
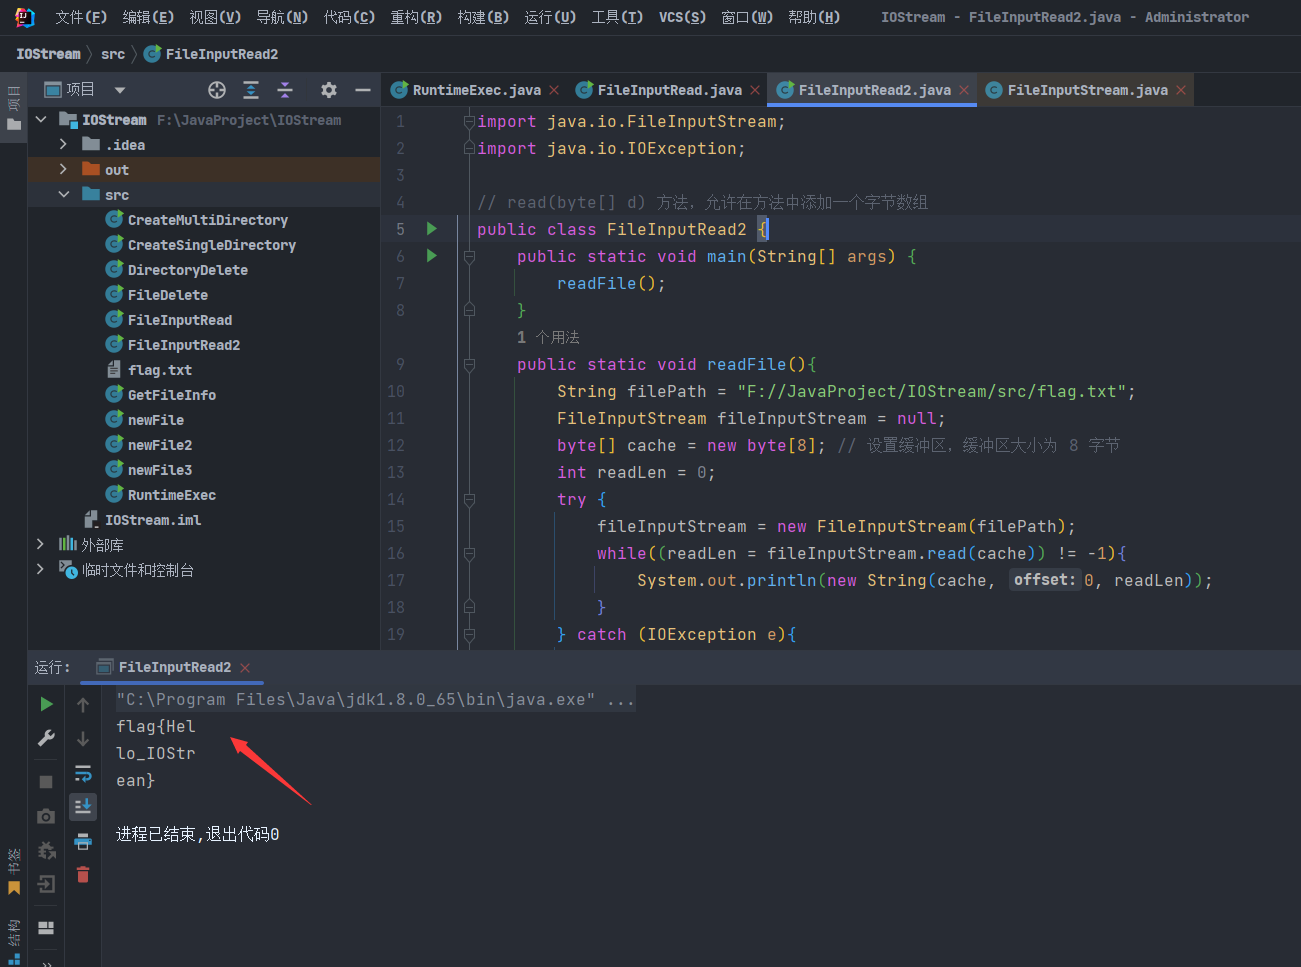
read(byte[] d) 方法
允许在方法中添加一个字节数组。
这种方式很有意思,当我们设置缓冲区的值为 8 时,若文件中的字符长度超过了 8,则会换行输出。这和上面的换行实际上是异曲同工。此时还记得我们上面的payload中设置的Cache缓冲区的值为1024。
1
2
3
4
5
6
7
8
9
10
11
12
13
14
15
16
17
18
19
20
21
22
23
24
25
26
27
28
29
| import java.io.FileInputStream;
import java.io.IOException;
public class FileInputRead2 {
public static void main(String[] args) {
readFile();
}
public static void readFile(){
String filePath = "F://JavaProject/IOStream/src/flag.txt";
FileInputStream fileInputStream = null;
byte[] cache = new byte[8];
int readLen = 0;
try {
fileInputStream = new FileInputStream(filePath);
while((readLen = fileInputStream.read(cache)) != -1){
System.out.println(new String(cache, 0, readLen));
}
} catch (IOException e){
e.printStackTrace();
} finally {
try {
fileInputStream.close();
} catch (IOException e){
e.printStackTrace();
}
}
}
}
|
3.FileOutputStream
write(byte[] b) 方法
1
2
3
4
5
6
7
8
9
10
11
| write(byte[] b):
public void write(byte b[]) throws IOException {
writeBytes(b, 0, b.length, append);
}
将 b.length 个字节从指定 byte 数组写入此文件输出流中。
覆盖:
类 OutputStream 中的 write
参数:
b - 数据。
抛出:
IOException - 如果发生 I/O 错误。
|
demo
1
2
3
4
5
6
7
8
9
10
11
12
13
14
15
16
17
18
19
20
21
22
23
24
25
26
27
28
29
30
31
32
33
34
35
36
| import java.io.FileNotFoundException;
import java.io.FileOutputStream;
import java.io.IOException;
public class FileOutputWrite {
public static void main(String[] args) {
writeFile();
}
public static void writeFile() {
String filePath = "F://JavaProject/IOStream/src/flag2.txt";
FileOutputStream fileOutputStream = null;
try {
fileOutputStream = new FileOutputStream(filePath);
String content = "flag{Hello_World}";
try {
fileOutputStream.write(content.getBytes());
} catch (IOException e) {
e.printStackTrace();
}
}catch (FileNotFoundException e){
e.printStackTrace();
}
finally {
try {
fileOutputStream.close();
} catch (IOException e){
e.printStackTrace();
}
}
}
}
|
write(byte[] b, int off, int len) 方法
将指定 byte 数组中从偏移量 off 开始的 len个字节写入此文件输出流。这里的长度一定要与输入的字符相等。
demo:
1
2
3
4
5
6
7
8
9
10
11
12
13
14
15
16
17
18
19
20
21
22
23
24
25
26
27
28
29
30
31
32
33
34
35
36
37
38
| import java.io.FileNotFoundException;
import java.io.FileOutputStream;
import java.io.IOException;
import java.nio.charset.StandardCharsets;
public class FileOutputWrite2 {
public static void main(String[] args) {
writeFile();
}
public static void writeFile() {
String filePath = "F://JavaProject/IOStream/src/flag3.txt";
FileOutputStream fileOutputStream = null;
try {
fileOutputStream = new FileOutputStream(filePath);
String content = "flag{hey_bro}";
try {
fileOutputStream.write(content.getBytes(StandardCharsets.UTF_8), 0, 13);
} catch (IOException e) {
e.printStackTrace();
}
}catch (FileNotFoundException e){
e.printStackTrace();
}
finally {
try {
fileOutputStream.close();
} catch (IOException e){
e.printStackTrace();
}
}
}
}
|
4.FileReader
public class FileReader extends InputStreamReader
用来读取字符文件的便捷类。此类的构造方法假定默认字符编码和默认字节缓冲区大小都是适当的。要自己指定这些值,可以先在 FileInputStream 上构造一个 InputStreamReader。
FileReader 用于读取字符流。要读取原始字节流,请考虑使用 FileInputStream。FileReader 将会一个一个字符读取,因此可以不乱码输出中文。
demo
1
2
3
4
5
6
7
8
9
10
11
12
13
14
15
16
17
18
19
20
21
22
23
24
25
26
27
28
29
| import java.io.FileReader;
import java.io.IOException;
public class FileReaderPrint {
public static void main(String[] args) {
readFile();
}
public static void readFile(){
String filePath = "F://JavaProject/IOStream/src/flag.txt";
FileReader fileReader = null;
try {
fileReader = new FileReader(filePath);
int readLen = 0;
char[] cache = new char[1024];
while ((readLen = fileReader.read(cache))!=-1){
System.out.println(new String(cache, 0, readLen));
}
} catch (IOException e){
e.printStackTrace();
} finally {
try {
fileReader.close();
} catch (IOException e){
e.printStackTrace();
}
}
}
}
|

5.追加写入
如果想在写入数据时不覆盖之前的数据可以在FileOutputStream的构造方法append参数设置为true
1
2
3
| fileOutputStream = new FileOutputStream(filePath);
fileOutputStream = new FileOutputStream(filePath), true;
|